Zapier is a tool that allows users to connect APIs and automate services without any coding.
In just a few clicks, you can set up your email account, your Dropbox, your podcast host, your Twitter account and many more web-based services to interact with Auphonic.
Zapier offers a free tier of 100 tasks per month, which should be enough for podcast automation workflows.
For example, it’s possible to start a Production when you move a file to a certain cloud storage folder (watch folder), process your recording when you finished a Zoom call, send your Auphonic production result to human transcribers, let Zapier know when a production has finished and automatically create an RSS feed and blog post, or inform your listeners on multiple social media channels at once.
Take Dropbox, for example.
While you can add Dropbox as an External Service to Auphonic and process files from your Dropbox on demand,
Zapier can watch a folder in your Dropbox and, as soon as you add a new file to it, automatically send it to Auphonic, where it is processed using a predetermined Auphonic Preset.
The preset, of course, can be configured to upload the processed audio to a different Dropbox folder, a web server, or a podcast hosting platform like Libsyn, among many options.
Dropbox Watch Folder Example:
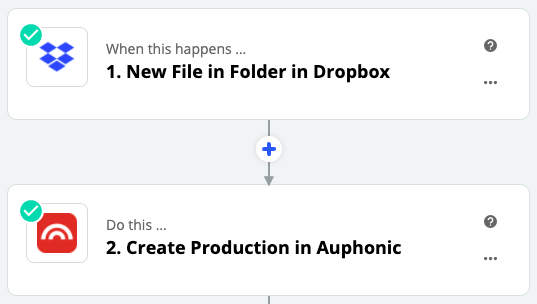
Create a new Zap, as Zapier calls the workflows, and add Dropbox to it.
Select the New File in Folder event and pick a folder.
Zapier will try to find a file in the folder to use as an example, so make sure it contains an audio file.
In the Do this step, select Auphonic and the Create Production event.
As the Input File select the Direct Media Link of the file in your Dropbox.
Choose an Auphonic preset and whether or not you want to start the production.
Note
To not waste any credits while playing around with this, set Start Production to No. In your Auphonic account, you will see productions being created by Zapier, but as long as they’re not started, they don’t cost any credits.
After a trial run, your Zap should be ready for use.
And just like that, the final manual step in your podcast production workflow could be dragging a file to your Dropbox folder. From there, Zapier and Auphonic would take over, automatically applying the post-production settings and filters, and uploading the finalized episode to your host.
We use Dropbox as an example here, but Zapier interfaces with a multitude of file storage services, including Box, Google Drive, OneDrive, and Amazon S3. In addition to that, Zapier works with around 2000 apps of all kinds. Here are a few other ideas:
The above Dropbox-Auphonic Zap works out especially nicely if you save your metadata within the input file, e.g. episode title, image and description. Auphonic preserves those unless you override them with the preset that you use.
It is possible to override metadata with a Zap as well. For instance, if you save your episode art as an image file in Dropbox alongside the audio file, Zapier can pick it up and send it to Auphonic too. Here is how it works:
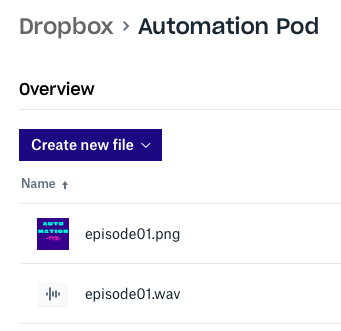
Add the image file to your Dropbox folder. Make sure the file name is the same as the name of the audio file, except for the extensions. Our example Dropbox folder looks like this:
Click the blue + symbol in Zapier between the two actions previously create.
Once again, select the Dropbox app, but this time with the Find File action.
Select the folder that contains your image file.
In the File Name dropdown, select File Name from the New File in Folder action.
Click into the File Name field and append the image file extensions you use for your episode art
Open the Auphonic action and select Customize Production:
set Change Metadata Fields to yes
set Metadata: Cover Image to Find File in Dropbox > Direct Media Link
scroll down and click Retest Action to make sure everything works
If you activated the above Zap as it is, it would trigger whenever any file is added to the Dropbox folder. Since we’re now also adding image files to the folder, it would produce an error if the image file gets sent to Auphonic instead of the audio file.
Luckily, Zapier allows you to filter for file types:
Scroll back to the top and click the blue + after the first Dropbox action once again.
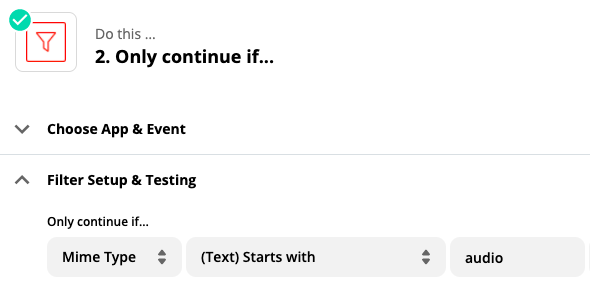
In the Helpers section at the top, select Filter.
In the first dropdown select Mime Type, set the second one to (Text)
Starts with and enter audio into the third field.
Now, the Zap only continues if an audio file has been added to the Dropbox folder.
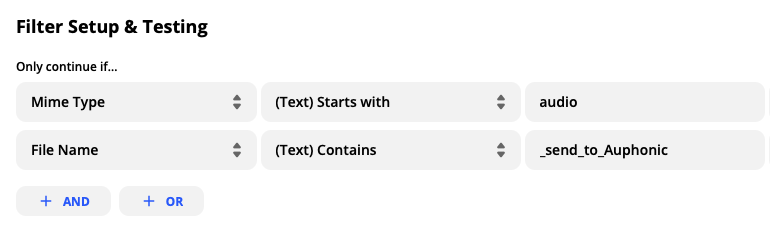
You can add more filters, for example to only continue if the file name contains _final or _send_to_Auphonic. You could also add another Helper action to delay the Zap for a minute or two, in case Zapier has already found the new audio file, but the episode art file has not uploaded to the Dropbox folder yet.
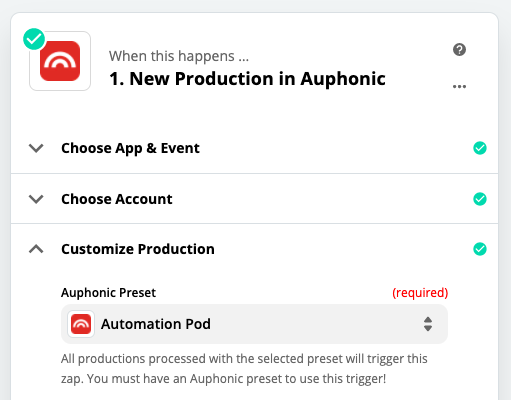
It’s also possible to use Auphonic as a starting point for a Zap. Once a production is finished, Auphonic can notify Zapier and trigger the execution of a Zap.
Note
Users with the free Zapier plan usually have to live with the fact that Zapier only checks for new data to start a Zap every 15 minutes. However, if you use Auphonic as a trigger, the Zap always starts instantly, regardless of your Zapier plan (because of REST Hooks).
Auphonic only starts a Zap when the production has used a specific Preset. So, if you work on different shows, you can have different Auphonic presets, each setting off a specific Zap.
Obviously, you can combine the Auphonic trigger with all file storage services to save the finished production files.
But we promised to look into some other Zapier apps as well. For instance, if you want to create a transcript of your episode and don’t want to use any of the speech recognition services that are integrated with Auphonic, Zapier provides you with additional options, including Trint, HappyScribe, and Descript.
If you need a more accurate transcript, you can even automatically send your Auphonic production result to human transcribers at Rev or CastingWords.
Publication, Hosting and Social Media Integrations
Zapier can also help with the publication of your new episode. It can send the file resulting from the Auphonic production to podcast hosting services like Captivate and podcast.co (or Youtube or Vimeo, if you produce videos), or create a new post on a Wordpress blog.
You could even create a podcast feed with Zapier, perhaps one of the cheapest options to create a podcast.
Once you have published your episode, you can add more actions to your Zap to announce the new episode on Twitter, Facebook, Instagram and many other social media platforms.
Of course, Zapier can automatically link to the current episode in those posts, but you could also easily have it attach audio or video created by an Auphonic production.
Keep listeners updated about the new episode by letting Zapier send an email with the audio file attached or keep your team updated by letting Zapier post on your Slack or create a new card in Trello.