Getting started with podcasting can be a laborious process, because it costs time to produce and money to host a podcast.
At Auphonic, we are constantly trying to make this process simpler and cheaper, not just through our own free automatic audio post production web service, but also by offering tight integration with various third-party services.
In this article, we will show you how to set up a podcast in a few minutes for free. The final solution includes a blog with a feed from which your listener's can directly access your audio and video files, all hosted on free services of your choice. Although we will suggest different solutions, we will somewhat focus on WordPress.com for the blog, Feedburner for the feed, and Archive.org for file hosting.
This article will also point at affordable file hosting solutions for professional podcasters whose requirements are more demanding than what free services can provide.
Step 1: Set Up a Blog
You will probably want to start by setting up a blog that serves as your podcast's main public interface. There are plenty of great tutorials on how to create a free blog on WordPress.com, Google's Blogger (also known as Blogspot), Tumblr, or other popular services, so we will not go into the details here.
Step 2: Pick a File Hosting Service
Next, you need to decide where to host the actual audio and/or video files for your podcast. In terms of required diskspace and bandwidth, this is by far the most demanding part of your toolchain. Nevertheless, free options are available.
For beginning podcasters, the free Archive.org service represents a good solution. Having said that, professional podcasters might find that the download speeds provided by Archive.org do not meet their requirements. In this case you might want to get an Amazon S3 account, which is free for basic usage and offers affordable packages beyond. A good compromise could be to host recent episodes (which usually require more bandwidth) on Amazon S3 and archive older episodes on Archive.org.
Other free or affordable solutions are provided by Libsyn, Soundcloud and others. If you are hosting a video podcast, YouTube is a natural choice.
Step 3: Audio Post Production, File Encoding, and Deployment
With a free Auphonic account, you can not only optimize your podcast's sound quality, Auphonic can also deploy your media files automatically to all of the file hosting services described above. In earlier blog posts, we have shown in detail how Auphonic can interface to your YouTube, Soundcloud, Amazon S3, Archive.org, and Libsyn accounts.
The cool thing is that you still need to upload your audio/video files only once, only that you upload them to Auphonic rather than directly to your file host. Auphonic then brings your audio and video files up to a professional sound quality, encodes the result to your preferred combination of output files, and distributes these to the service(s) of your choice.
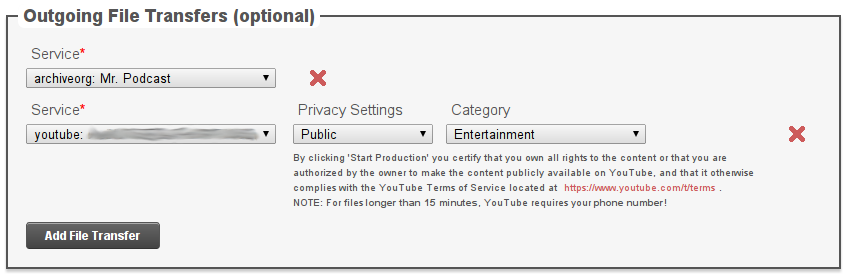
To enable this feature, you first need to add your preferred file hosting services on the External Services page of your Auphonic account:

Services that you have added in this manner can then be added to an Auphonic production:
When running the production, your files will automatically be deployed to all added services. Your production's status page will inform you of the exact locations of all files.
Step 4: Set up a Feed
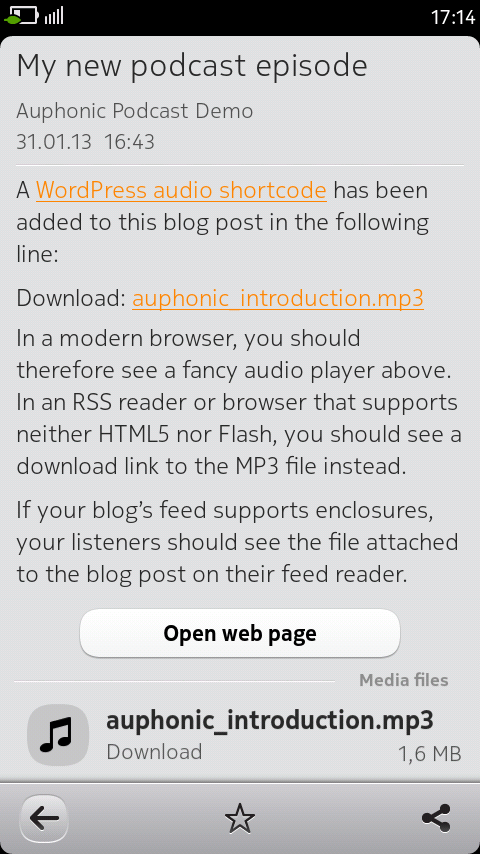
Maybe the most essential part of your podcast is a feed to which listeners can subscribe to retrieve automatic updates. Podcasters generally prefer the RSS 2.0 feed format recommended by iTunes. Most free blogging services generate RSS feeds automatically. However, it is important that your feed supports enclosures, a sort of RSS equivalent of email attachments. The advantage of 'enclosed' audio or video files is that your listeners can access these directly from their feed reader rather than having to open a browser.
Unfortunately, not all blogging services support enclosures without troubles.
Rather than relying on your blog's standard feed, we therefore suggest that you generate a new one with Feedburner, a free Google service that offers several advantages.
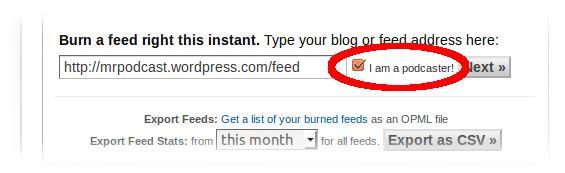
For example, you will not loose your feed if you ever decide to move your blog to a different hosting service. Feedburner also gathers various statistics about your podcast, which would otherwise be difficult to aggregate. To use Feedburner, simply point it to the URL of your blog's standard feed. Be sure to tick the "I am a podcaster!" checkbox to enable enclosures.
After retrieving your new feed's URL from Feedburner, you then need to point your blog to the new feed. The best way to achieve this depends on the blogging service that you use.
In the case of WordPress, solutions can be tricky and do not always work for blogs hosted on wordpress.com itself. An easy alternative is to drag an RSS widget pointing to the new feed to your blog's sidebar. At least for the default WordPress theme, this conveniently removes the previous link to the standard WordPress feed as well.
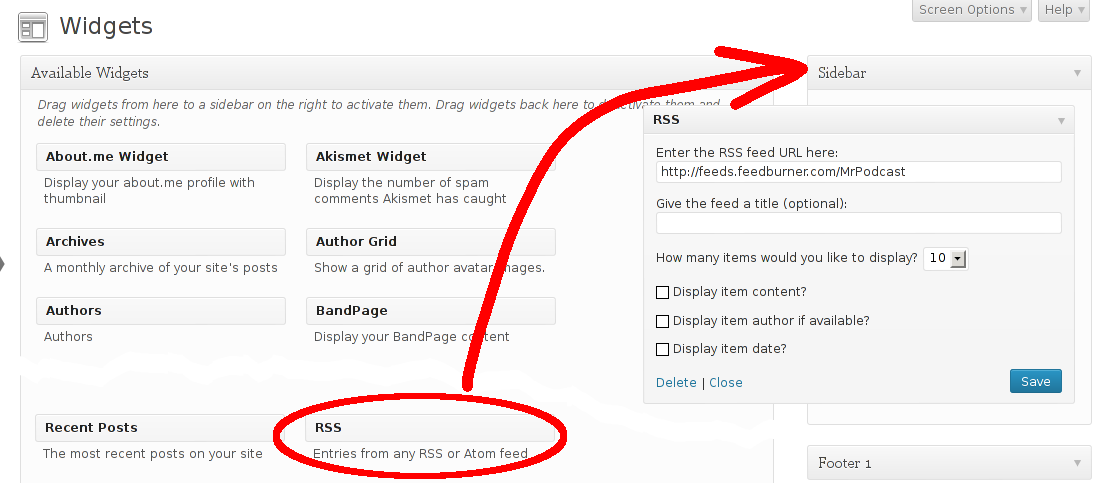 Replacing the standard WordPress feed with one from Feedburner (Dashboard→Appearance→Widgets).
Step 5: Create Your First Episode
You are now ready to record your first podcast episode! On your laptop or PC, you can record with the free Audacity editor and then upload your recordings to Auphonic through your browser. On your smartphone, you can use the free Auphonic mobile app to combine both steps. In either case, Auphonic will automatically post-produce your audio and deploy the resulting audio/video files to your file host(s).
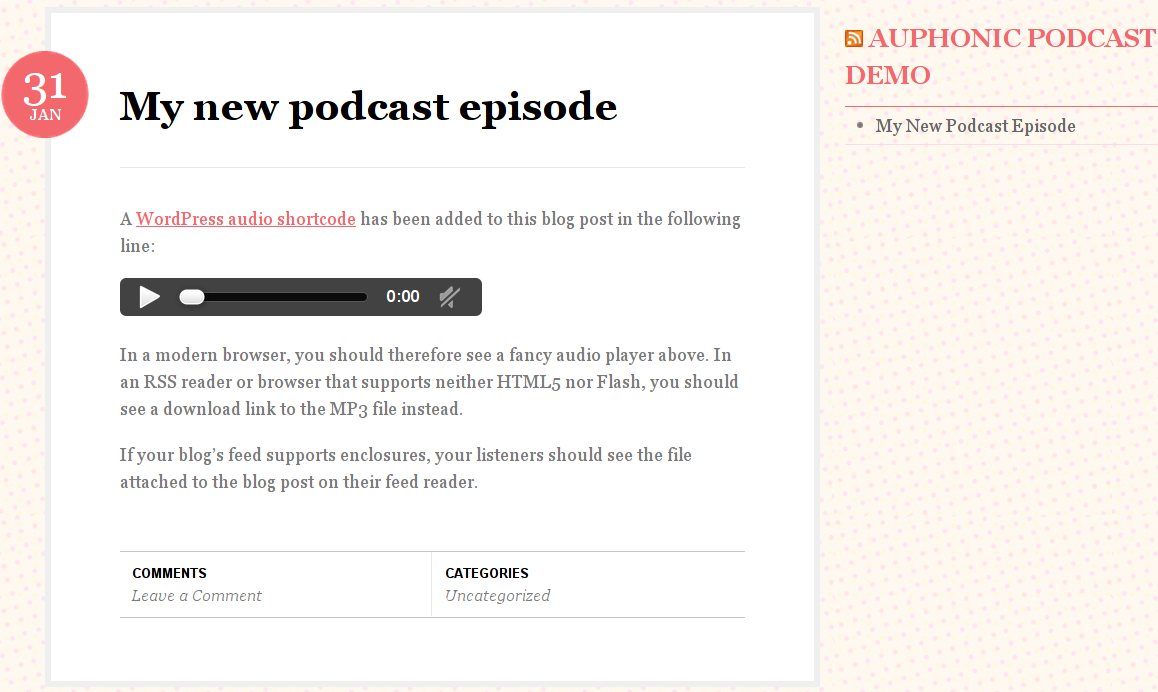
All you then need to do is create a blog entry that includes a link to the media files for the current episode. If you use WordPress, check out their [audio] shortcode, which works for MP3, M4A, OGG, and WAV files:
[audio http://my.filehost.com/my.mp3]As you can see in the website screenshot above, the above line in a WordPress blog post will create a customizable audio player (HTML5 with Flash fallback) on modern browsers. On RSS readers or older browsers, you will get a a download link to the actual audio file instead and – if your feed supports enclosures – an audio file conveniently attached to your feed (see feed reader screenshot above).
Step 6: Publish Your Podcast on iTunes
Once you have recorded an episode, you might want to publish your podcast on iTunes, to ensure that it can be found more easily by potential listeners.
Video Tutorial
If you understand German, all step above (and more) are discussed in this great video tutorial by Senor Kaffee:
Conclusion
Podcasting has become much simpler than it used to be. With the tools available today, it is now possible to set up a podcast for free in a couple of minutes. Creating a new episode simply becomes a matter of recording some audio or video and writing an accompanying blog post. All steps in between, from audio post production to file deployment and RSS feed generation, can be automated with tools like WordPress, Feedburner, and Auphonic.
At Auphonic, we nevertheless believe that podcasting can be made even simpler. We will continue to simplify the workflow outlined above, so stay tuned for new developments. :)